Short answer
Choose the movement that makes the product easier to present and remove.
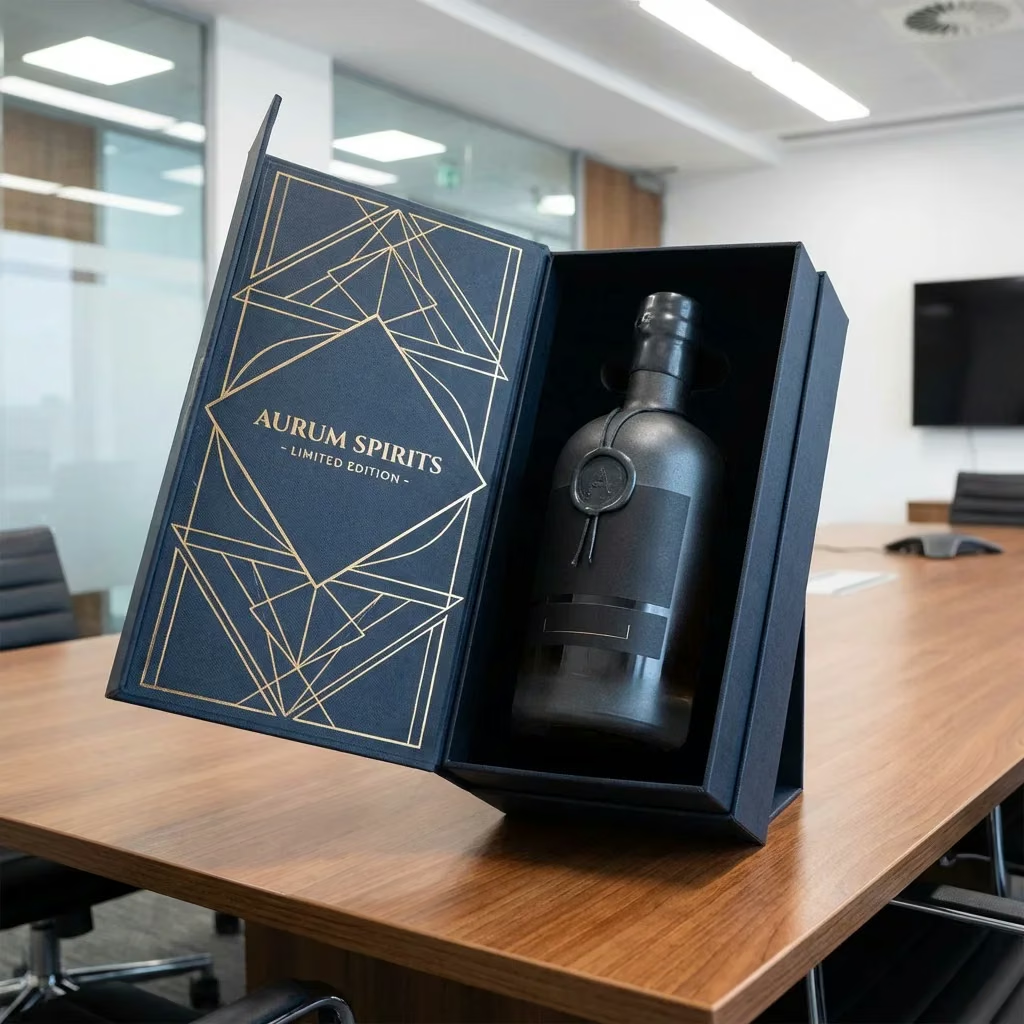
Choose a magnetic rigid box when the user should lift one lid, see the product arrangement immediately, and use the inside lid as part of the presentation. Choose a drawer box when a staged reveal, horizontal pull, compact top opening, or tray-led organization better suits the product.
Neither structure is universally more premium, protective, economical, or sustainable. Those outcomes depend on the complete construction, the loaded insert, the production tolerance, the packing method, and what happens after the cartons leave the factory.
Compare the same brief twice. Keep product dimensions, packed weight, board, wrap, artwork, finish, insert objective, quantity, protection, and destination constant. Otherwise the price and performance comparison is not meaningful.
Side-by-side
The opening path changes the whole specification.
The difference is larger than a lid versus a tray. Opening direction affects display, hand access, artwork, insert geometry, tolerance, and the space needed around the pack.
Scroll horizontally to view all columns →
| Decision | Magnetic rigid box | Drawer rigid box | What to verify |
|---|---|---|---|
| Opening movement | A hinged lid rotates upward and closes against concealed magnetic points. | An inner tray moves horizontally through an outer sleeve. | Available opening space, user grip, opening direction, and intended handling position. |
| Product reveal | The arrangement is usually visible in one view after the lid opens. | The product appears progressively as the tray travels. | What should be seen first and how much travel is needed before removal. |
| Main control | Hinge behavior, lid alignment, magnet position, polarity, and closing contact. | Sleeve clearance, tray squareness, surface friction, pull access, and stopping behavior. | Representative sample materials and an agreed physical acceptance reference. |
| Insert relationship | The insert and product must stay below the lid closing path and visible presentation field. | The insert must not bow the moving tray and must leave hand access as the product is exposed. | Loaded fit, removal path, sensitive surfaces, accessory placement, and product movement. |
| Brand surfaces | Outer lid, inside lid, base surround, and insert can form one presentation field. | Sleeve, tray front, pull feature, and progressive reveal create several sequential surfaces. | Artwork hierarchy before foil, emboss, or other focal finishing is positioned. |
| Pack-out | Usually assembled; a separately engineered collapsible version may change volume and setup. | Normally assembled as a sleeve and tray; individual protection must preserve sliding faces. | External dimensions, units per carton, protection, gross weight, pallet, and destination handling. |
| Application constraint | Magnet-sensitive products or components require application review. | No magnetic closure, but travel and tray retention still need product-specific review. | Product restrictions, retail handling, storage, shipment, and end-user environment. |

Magnetic opening
Use the lid when the presentation should arrive in one view.
A hinged magnetic box can expose a broad presentation field without removing a separate lid. The inside lid may carry instructions, a brand statement, or graphics that belong with the product arrangement.
- Allow space for the lid to rotate without hitting a shelf, wall, display, or neighboring item
- Keep the insert and product clear of the lid closing path
- Approve magnet position, alignment, closing contact, and hinge behavior in a structural sample
- Disclose products, accessories, cards, or devices that may be sensitive to magnets
The closure should support the use case, not replace product retention. The insert and outer transit pack still control movement and protection.
Drawer opening
Use the tray when the reveal should happen in stages.
A drawer box separates the exterior sleeve from the moving tray. The sleeve can conceal the product until enough travel has occurred, creating a deliberate sequence for a small product, set, document, or accessory.
- Define whether the tray opens from one end, both ends, or remains captured
- Choose a pull ribbon, finger notch, or other access method around real tray weight and grip
- Approve sliding effort using representative board, wrap, seams, and finishing
- Leave enough reveal and finger access to remove the product without overextending the tray
A tight sample is not automatically a premium sample. The tray must move consistently after material buildup and production variation are considered.

Quality risk
Control the interface that moves.
Both structures can look correct when empty and fail when the real product, insert, finishing, individual protection, or production variation is introduced.
- Loaded geometryCheck the actual product, accessories, insert, removal clearance, and center of mass—not only the empty box.
- Material buildupBoard, wrap paper, overlaps, seams, lamination, fabric, ribbon, and adhesive all change the finished interface.
- Repeated handlingAgree how many opening cycles represent the project and observe hinge, close, slide, pull, edge wear, and product position.
- Visible alignmentReview lid-to-base reveal, tray-to-sleeve reveal, artwork registration, foil or emboss location, corners, and wrap seams.
- Pack-out conditionConfirm individual wrap, orientation, carton pressure, divider use, carton count, and whether protection affects appearance or movement.
- Delivery conditionAdd handling or transit checks that reflect product fragility, destination, freight mode, pallet plan, and receiving process.
Cost and logistics
Do not compare structure names as prices.
A magnet adds a component; a drawer adds a moving tray-and-sleeve fit. Either structure can become the higher-cost or larger-volume option after the full build is defined.
Scroll horizontally to view all columns →
| Quote field | Keep constant | Show separately |
|---|---|---|
| Product | Dimensions, packed weight, orientation, fragile areas, sensitive surfaces, and accessories. | Any structure-specific clearance, opening, retention, or magnet restriction. |
| Appearance | Board direction, wrap family, artwork, print coverage, finish, color reference, and visible quality level. | Inside-lid artwork, tray front, ribbon, notch, magnet, or additional wrapped component. |
| Insert | Material objective, product retention, removal, presentation height, and accessory layout. | Changes required by lid clearance or tray wall and travel constraints. |
| Commercial | Quantity per SKU, artwork versions, sampling scope, inspection, currency, and quotation validity. | Tooling, magnets, ribbon, extra assembly, alternate construction, and version-specific setup. |
| Delivery | Individual protection, carton limit, destination, target date, Incoterm, and freight scope. | Units per carton, gross dimensions and weight, pallet pattern, setup labor, and shipment volume. |
Use the custom packaging cost and MOQ guide to compare the complete commercial scope rather than one headline unit price.
Sample plan
Make both prototypes answer the same questions.
The comparison is useful only when the prototypes represent the intended product and production route closely enough to expose the real tradeoffs.
Freeze the shared inputs
Record product, weight, dimensions, insert objective, materials, appearance, quantity, pack-out, and destination.
Define each movement
Set lid rotation and close for the magnetic option; set tray direction, access, travel, clearance, and retention for the drawer option.
Use the real product
Check presentation, product movement, removal, sensitive surfaces, center of mass, and user grip with the intended accessories.
Review landed scope
Compare appearance, behavior, quality risk, production assumptions, individual protection, carton efficiency, and delivery cost.
Record the decision with the packaging sample approval checklist before authorizing bulk production.
RFQ checklist
Send one controlled brief and request two clearly separated options.
- product dimensions, weight, orientation, fragile areas, sensitive surfaces, and accessories;
- the desired first view, opening direction, removal path, and available space around the user;
- insert material objective, product retention, presentation height, finger access, and accessory layout;
- board, wrap, print, artwork, color reference, foil, emboss, laminate, texture, ribbon, or notch preferences;
- quantity per SKU, versions, repeat forecast, sample purpose, approval criteria, and inspection needs;
- individual protection, units per carton, destination, required date, and delivery scope.
Ask each quotation to identify what changes between the two structures. A blended answer hides the exact component, assembly, carton, and freight differences you need to evaluate.